
Here is a list of how you can brew coffee without a coffee maker.
If you are a coffee lover, and probably you are, then indeed you may have a coffee machine, either it can be a french press or a drip coffee maker.
But chances are there, you are out of your home, and it is impossible to carry a coffee maker, or your machine is nonoperational for several reasons.
I faced this problem too.
So, I have found and brewed several methods. Below I’ve covered possible aspects and situations so that you don’t miss your cup of joe.
Brewing Requirements (Optional)
Fresh Grounds
Fresh coffee grounds are always preferred over pre-ground coffee as it tastes better, are more flavorful, and have a great aroma.
It is even better if it is ground within the last two weeks. You can grind coffee beans with the help of a pestle and mortar.
Pre-ground coffee has benefits as you don’t have to grind it yourself, and it also saves time.
Water
It is always better to use filtered water to bring more flavor to your cup.
Not only will filtered water help you bring the desired taste alone, but the water temperature also matters because if water is hotter, it will over-extract your coffee, and if it is less hot, it will under-extract your brew.
The right water temperature also depends on your brew method (for example, it is not recommended to use hot water in the cold brew).
We use an average water temperature of 195-205 Fahrenheit for a hot brew.
If you don’t have any temperature measuring device or a kettle, then when water starts to simmer, remove the water from the heat source and wait for around 30 secs.
#1 – THE STOVETOP METHOD
Just woke up and your coffee maker is kaput, don’t worry just give a try to some old school brewing methods and start your day.
For brewing this method you don’t need to rush to the supermarket, just read the instructions below and enjoy!
Requirements:
- Coffee grounds
- Water
- Saucepan
- Spoon
- Ladle
- Mug
Preparation:
Brewing Time: 10 Mins.
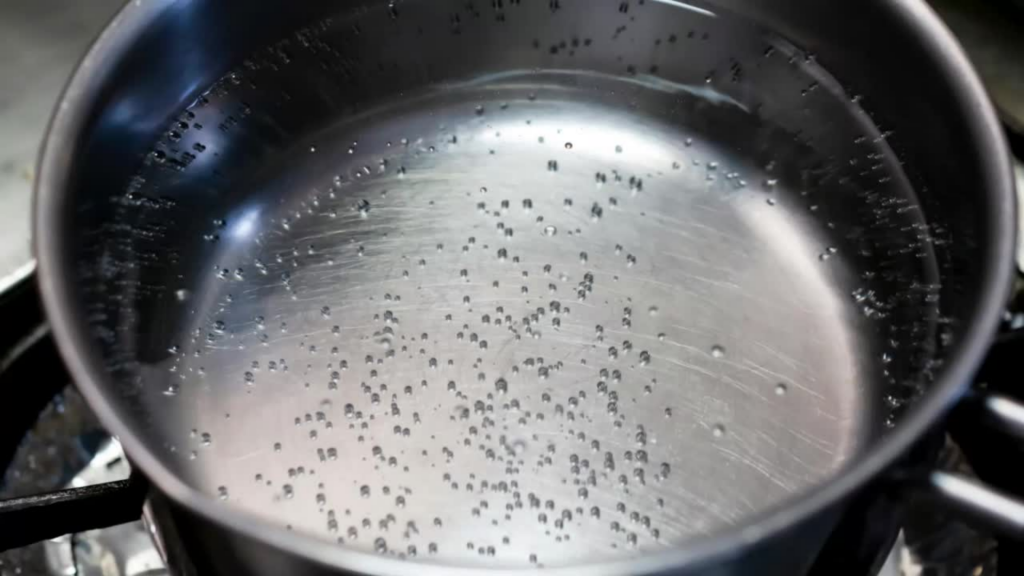
- Take a saucepan and pour water into it, also add slightly extra water just to make sure that while boiling water it will not lose your desired quantity of coffee. Tip – Always prefer to follow the coffee-to-water ratio.
- When the water is ready to boil. Add coffee grounds of your choice into the saucepan and stir with the help of a spoon. (Prefer 2½ tablespoons for 8 fluid ounces.) (we recommend always measuring coffee and water in grams)
- Let them boil for 2-2:30 minutes—the first minute for full flame and the rest for the low flame. Remember – the more it boils the more over-extracted coffee will get and may taste bitter.
- Turn off the knob and wait for 4-5 minutes and give the coffee grounds some time to sit at the bottom. When it was boiling the grounds were at the top.
- Use a ladle and slowly fill the ladle and get the brewed coffee into your cup without taking grounds. Tip – don’t deep dive the ladle and try to get the watery part.
- If you don’t have a ladle, try to slowly pour the coffee into your cup and watch that you don’t get ground.
(Tip – if you are using clothes to hold the pot. Be cautious while pouring into your cup. As you start pouring, the hot smoke goes in the opposite direction and chances are there it will harm your skin.)
#2 – MAKESHIFT POUR OVER
Love pour-over? I love them too. Makeshift pour-over is a mixture of Kalita Wave, HARIO V60, and Chemex.
I’ll tell you how, Hario is in a conical shape, Kalita is bottom flat, and Chemex is thick. So when we use cloth or paper as a filter, it will neither form a cone nor flat bottom (it is just between them), and as it is thick, it acts like a Chemex.
Requirements:
- Coffee grounds
- Hot water
- Clothes pins
- Paper Filter, linen, or cotton cloth
- Cup or mason jar
Preparation:
Brewing Time: 15 Mins.
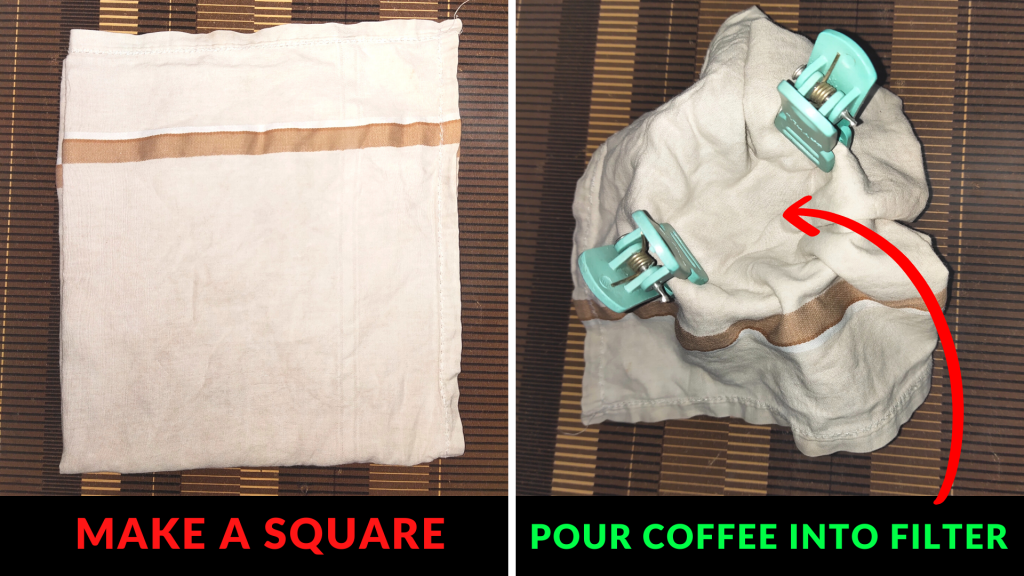
- Take a paper filter or a clean handkerchief (as it is easily available) or tissue paper. And make a square and put it over the cup (if you are using tissue paper or anything very light, then use two or three pieces of tissue paper). Make a little larger square because we need to tie clothespins to hold the filter.
- Take 1 tbsp of coffee grounds for each cup and evenly spread it over the filter.
- Use a Kettle, Saucepan, or Microwave, and take water according to your desired cup of coffee. Once it begins to simmer, then after 30 seconds, remove the water from the heat.
- Pour a little water over the filter and let the grounds release carbon dioxide (you can see it when coffee blooms).
- After 30 seconds, evenly pour the rest of the water 4-5 times. While pouring, also watches that the clothespins are intact.
- When all the water filters through the grounds, gently remove the clothes pins or clips and enjoy coffee.
#3 – THE STRAINER METHOD
Are you a coffee person that doesn’t like a single coffee ground in your cup? And also short on time?
Then with no coffee maker, you must try a fine mesh strainer. It is a straightforward and fast coffee filtration method, with no waiting time and right after brewing, just pour in your cup.
Requirements:
- Ground coffee
- Water
- Kettle or saucepan
- Mesh strainer
- Mug
Preparation:
Brewing Time: 10 Mins.
- Measure the proper amount of water with the help of a measuring cup, or it can be measured with the cup you regularly use. (generally, 1 cup = 8 fl. oz.)
- Start boiling your water with the help of a saucepan or tea kettle.
- Add coffee grounds into the water and stir it properly when you see little dotted bubbles at the bottom (basically, it’s a sign of water being heated and ready to boil).
- Leave them boiling for 2-3 minutes.
- Switch off the knob and enjoy the aroma.
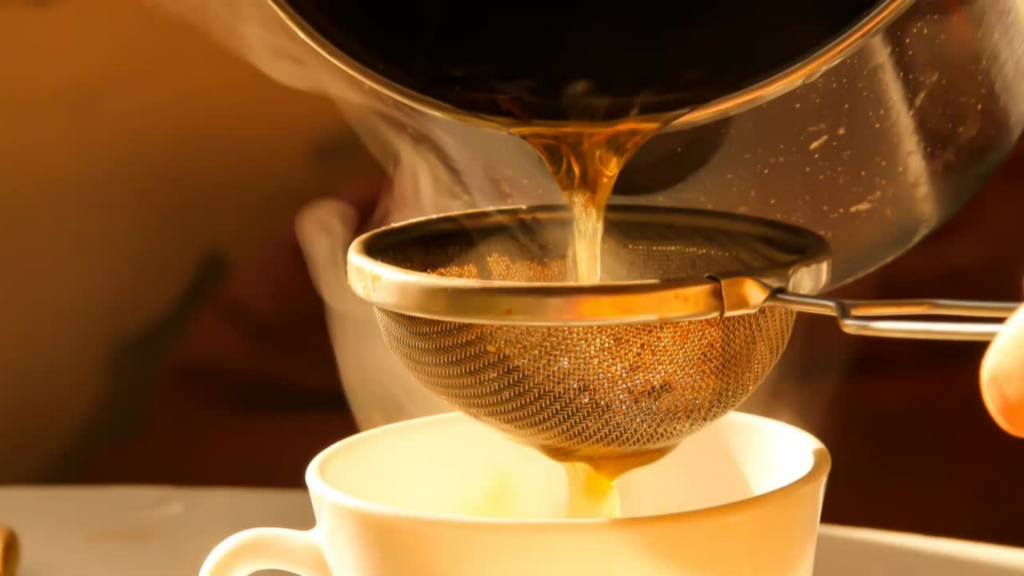
- Use a fine mesh strainer and place it over your cup or thermos.
- Slowly start pouring your brewing. The strainer will filter out the grounds. (Tip – keep the pouring more slowly as your pour continues because the grounds will gradually start blocking the strainer. So keep it very slow as you go).
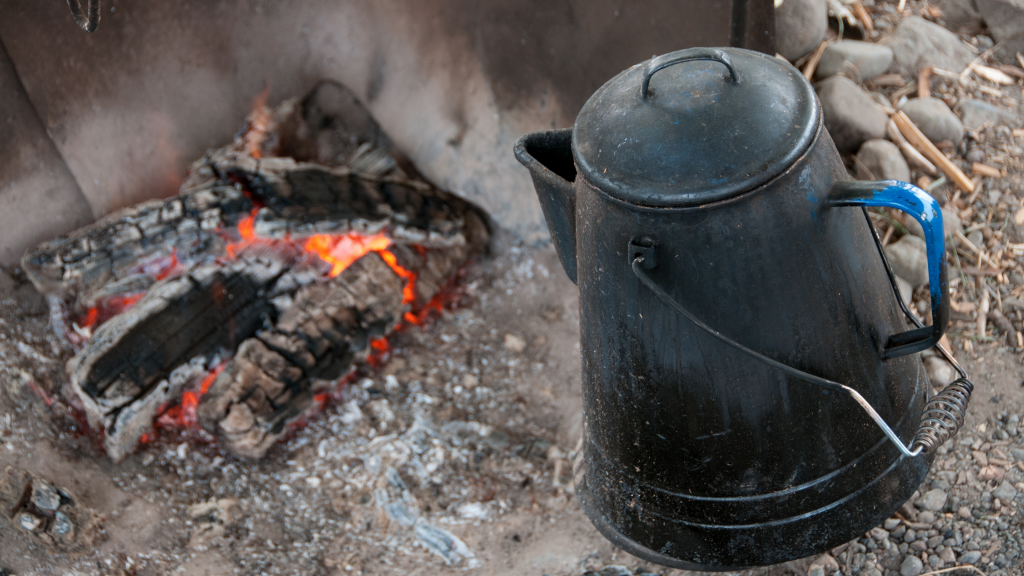
#4 – COWBOY COFFEE
Modern cowboy coffee methods don’t require a campfire or open fire but can be brewed on a stove or kettle.
This method has a vibrant history (especially for cowboys), and that’s why people love to drink this.
Cowboy coffee is likely a french press coffee without a filter. And if it is brewed right, it can taste bolder and more flavorful.
Requirements:
- Coffee Grounds
- Water
- Kettle or Pot
- Spoon
- Cup
Preparation:
Brewing Time: 15 Mins.
- Add your desired quantity of water into a kettle or pot (prefer measuring it).
- Let the water boil for 3 minutes.
- Remove the kettle from flame or heat, and let it cool a little for 15-30 seconds – the purpose of this is to make the water idle for brewing, which is around 195-200 Fahrenheit.
- Then add the fine coffee grounds into the pot and stir it for 15-20 seconds.
- Leave the pot for 1½ minutes so that the water extracts the coffee, and again stir it gently.
- Leave the pot for 2 more minutes so that the coffee grounds will steep to the bottom (not 100% but nearly 70%-80%)
- Then with the help of a tablespoon, put some very little cold water in the middle and also at the sides of the pot; this will help the coffee grounds fully steep to the bottom. (Believe me, it works)
- Now, slowly pour the coffee into your cup and enjoy your brew.
#5 – COLD BREW METHOD
When the heat strikes and you are always looking for something cold and chilled, why not if it is in the form of coffee (your favorite beverage)?
Even better, you don’t need any special equipment.
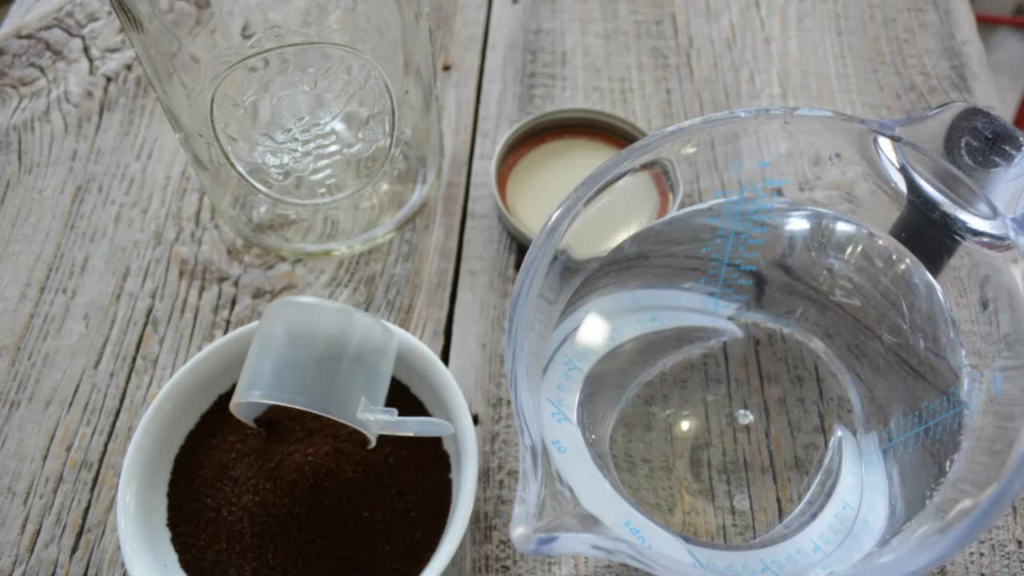
Requirements:
- Coffee Grounds
- Water
- Mason Jar or Pitcher
- Refrigerator
- Time
- Cheesecloth or Strainer
- Spoon
Preparation:
Brewing Time: 12 – 24 hours
- Take a measuring cup and put 1½ measuring cup of coarse coffee ground or preferably (1:4-1:8 if diluting, 1:12ish if not).
- Take a Mason jar or a pitcher and put your coarse coffee grounds into it and pour normal water (for 1½ measuring cups of grounds, use 1400-1500 ML of water)
- Use a spoon and stir it well.
- Close the jar or pitcher and put it in your refrigerator for 12 – 24 hours. (12 hours for weaker brew and 24 hours for more potent brew). The longer you leave your jar in the refrigerator, the stronger it becomes.
- Take another jar or mug and put the strainer over, and slowly pour your cold brew.
- You can use sweeteners and ice as toppings (it’s optional) and Enjoy your java.
Want to learn more about cold brew? Check out our article How to make cold brew coffee
Also, cold brew has a positive side, i.e, it has less acidity than hot brew. It can last up to a week in the refrigerator and you don’t need to brew every day.
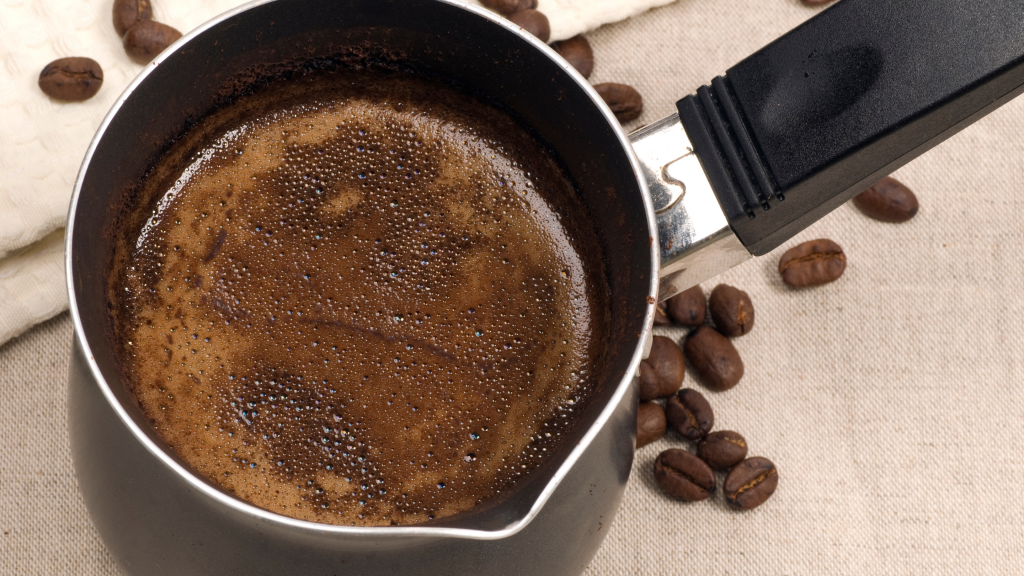
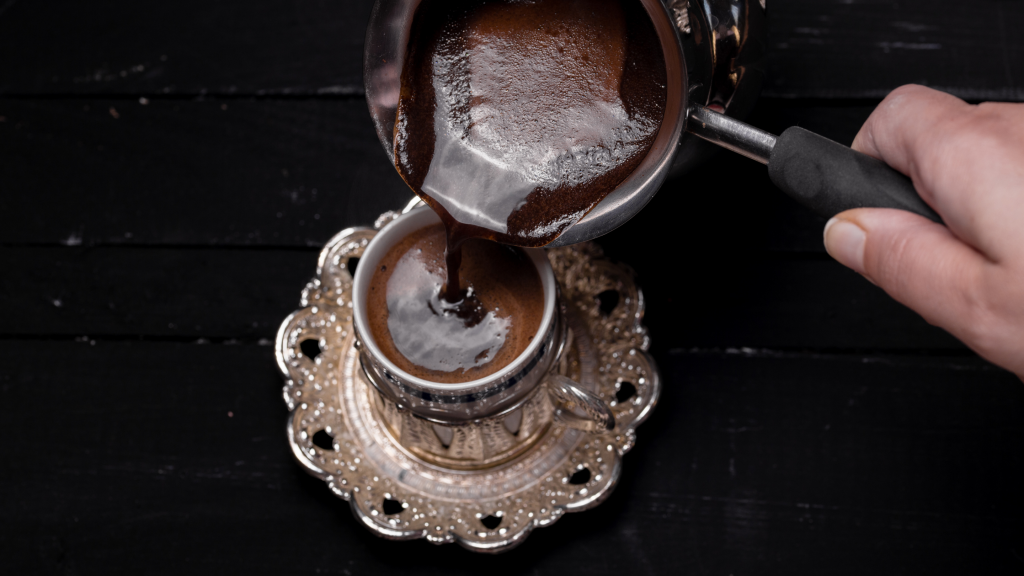
#6 – TURKISH COFFEE
kahve or Türk kahvesi, oh don’t be confused; it’s also the synonym of Turkish coffee called by natives, so surprise your close ones by telling them, “I will make you a kahve.”
Turkish coffee is not a type of coffee bean, but it’s a brewing method that requires arabica beans. So enjoy brewing special methods and drinking and pungent taste.
Requirements:
- Coffee grounds
- Water
- Small pot or cezve
- Spoon
- Sugar (Optional)
Preparation:
Brewing Time: 15 Mins.
- Take a cezve or a pot and pour water according to your desired cup of coffee (we prefer a 1:10 coffee to water ratio). To enjoy more flavors, use filtered water.
- Take coffee grounds; we highly recommend using medium-roasted fine grounds because, in this method, we don’t use any filtration.
- You can add sugar; by the way, it’s optional. If you are using sugar, put it before the grounds so it can mix well.
- Stir the mixture 10-15 times.
- Turn on your gas stove, set the flame to medium to low, and put the pot or cezve over it. Don’t stir while brewing, as it will over-extract the coffee.
- Don’t leave your pot alone, as Turkish coffee requires attention, which is very important because you have to prevent boiling.
- Now, you’ll see side rises & some foam starts appearing on the edges (from here, it requires more attention). Once it is about to boil and foam fully appears, remove the pot from the stove. This method creates a thick, frothy, and robust brew.
- You can enjoy this in two ways: Let it cool and slowly pour the coffee into your cup.
- Collect the foam using a spoon, put it in your cup first, and then put the rest of the coffee. ( Remember to collect foam very fast as it will disappear soon when you remove it from heat).
Traditionally Turkish coffee was brewed with the help of water only, but nowadays, many use milk also, and it is fine, but don’t add it after brewing.
Also, it may taste bitter; that’s why it is consumed with something sweet or people add sugar.
#7 – THE FAUX FRENCH PRESS
Cravings for oily and bold taste like French Press coffee but unfortunately don’t have access to your French Press. I got you.
Don’t worry; we’ll try to brew and match the same taste as you like. I’ll make sure that all the things are readily available.
Requirements:
- Coffee grounds
- Hot Water
- Deep Bowl
- Spoon
Preparation:
Brewing Time: 15 Mins.
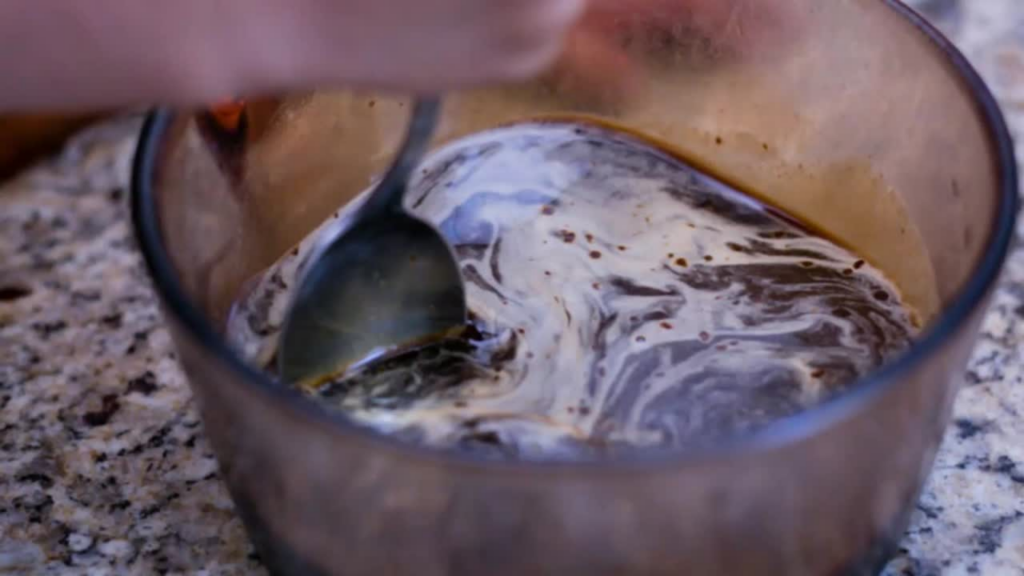
- Take a kettle or a saucepan and start boiling your water (use a 1:14 coffee-to-water ratio)
- Take a deep bowl and put the coffee grounds into it.
- Pour a little hot water to saturate it, and then add it according to the number of cups you want. (1 cup = 8 fl. oz.) (You can use 1 -1½ tablespoons of coffee grounds per cup).
- Stir it well and leave the mixture for 3-5 minutes (depending on how strong you want).
- After this, most ground steps down to the bottom.
- Use a spoon and firmly press the ground to the bottom. Remember, don’t show agitation as it remixes the grounds and wastes your time.
- Pour the coffee into your cup and simultaneously press the grounds at the bottom. (Tip – use kitchen cloth for holding the bowl)
- Enjoy your java.
FAQs
How to make coffee without a coffee maker with milk?
You can try out the famous dalgona coffee.
For brewing 1 cup of coffee, take 1 tbsp of instant coffee, 1 tbsp of sugar, and 1 tbsp of hot water in a bowl and start beating fastly with a spoon.
When it becomes fluffy, foamy, and very light brown; then add hot milk in a glass, pour the paste and stir well.
Want to learn more about dalgona coffee? Check out our article How to make Whipped Coffee (Dalgona Coffee)
What happens if you don’t grind coffee?
Technically you can brew coffee with just coffee beans but because the surface area of beans is way too smaller to the ground so it will take more time to brew.
How long is the coffee fresh after grinding?
Generally, coffee grounds are fresh for an average of two weeks but it also depends on how recently they are roasted.
The Bottom Line
The key to making flavourful coffee without a coffee maker is always the proper brewing techniques and perfect ratios.
I have covered several methods so that you can decide which situation fits the most suitable brewing for you.
Apart from these, various other methods can be brewed with no special equipment, like instant coffee or DIY Coffee Bags, but most people don’t like instant coffee, and DIY coffee bags are time-consuming, so I didn’t add them.
If have you tried any of them? Please comment.
Happy Brewing!