
Wondering how to make cold brew coffee at home? Here is my all-time favorite working recipe to brew it correctly with the right flavors.
I started making cold brew in the early year of 2020, and in this article, I will share the recipe and variations that I have made myself and got excellent feedback on.
Cold brew is the easiest way to make your coffee, but you may have to wait around the clock to fulfill your cravings. Believe me, it’s worth the patience.
So, without taking more of your patience, let’s start our step-by-step guide.
About This Recipe
Cold brew coffee is a simple brewing method that gives a smoother and richer flavor.
We’ll brew cold brew in a concentrate, which means making it with more coffee and a few water and leaving it for infusion for around 12-24 hours.
This homemade cold brew will be cost and time efficient because the average price for a cup of cold brew is around $3 – $5, and it’ll cost much less if you brew it at home.
The one-time investment is comparatively high, but in the long run, you’ll be benefited. And since it lasts longer than regular coffee, thus you don’t need to make it every day; it’s a time saver.
Cold Brew Ratio
Like any other coffee brewing method, cold brew must be made in proportions that will yield a consistent flavor every time.
The ratio of cold brew coffee and water depends on how strong you want your coffee to be. Generally, I use a 1:2 ratio for concentrate, which means 1 part coffee and 2 parts water.
Some use a 2:1 or 1:1 ratio for more concentrated brews. To reduce the concentration, you can lower the ratio to 1:4 or 1:5.
However, you can play with these ratios to find what works best for you.
Requirements
- Coffee Beans
- Coffee Grinder
- Mason Jar
- Water
- Spoon
- Kitchen Weighing Scale
- Fine Mesh Sieve or Strainer
- Cheesecloth
- Patience – Most Important
Grinding
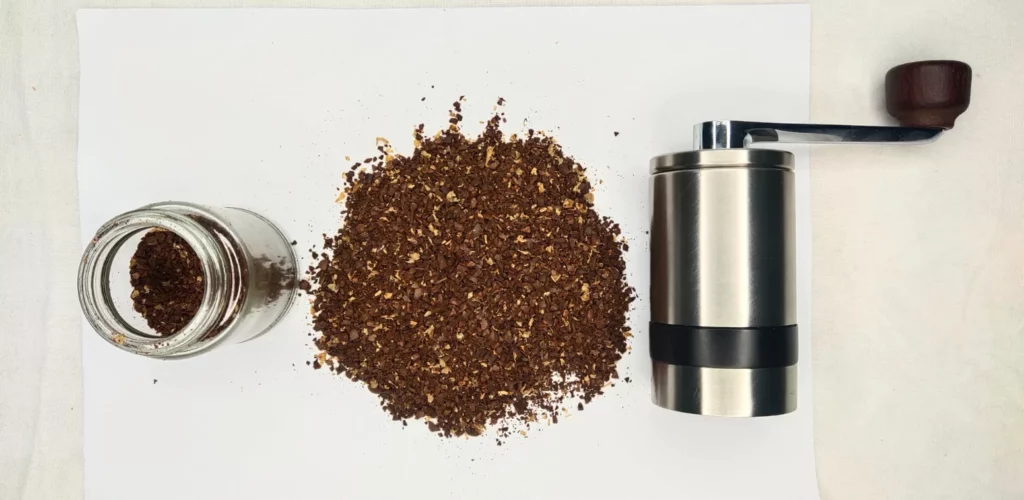
If you read my coffee recipes, as usual, I always recommend measuring coffee grounds before grinding.
For cold brew, grind on the coarsest setting you have in your burr grinder (recommended).
A simple rule for coffee grinding is – The longer the water is in contact with the ground, the coarser the grind should be and vice-versa.
You may think, why coarser grind, or what if we brew with finer grounds?
As you know, for cold brew, grounds and water are steep for more than 12 hours. So, if you use finer grinds, it will over-extract your concentrate and taste bitter.
How to Make Cold Brew Coffee at Home
Step 1: Add Coffee and Water

Take a mason jar, place it over the kitchen weighing scale, and press the tare button to zero.
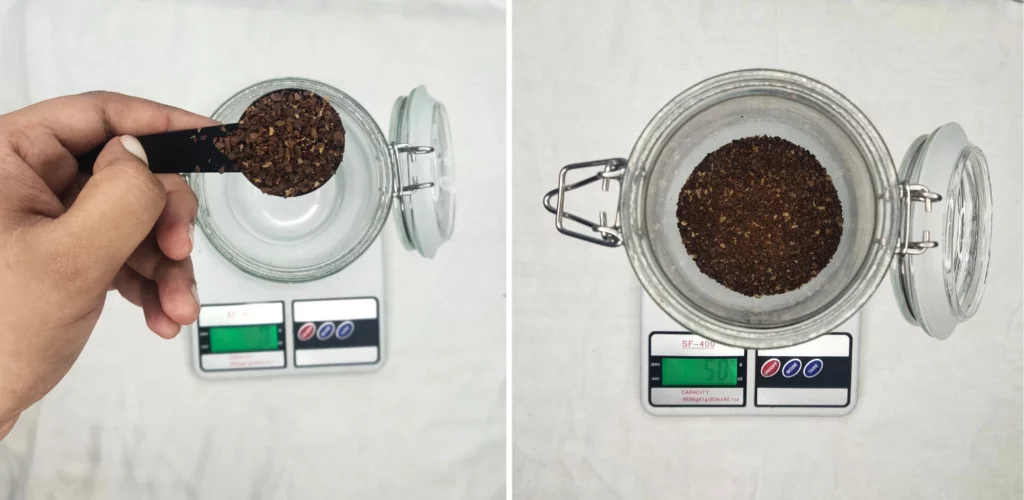
Add coffee grounds into the mason jar – I took 50 grams. Give it a little shake so that it is evenly spread.
Again press the tare to zero. Start adding water – it can be either at room temperature or chilled.
I am brewing a concentrate, and I am taking a 1:2 ratio, so I’ll add 100 grams or milliliters of water.
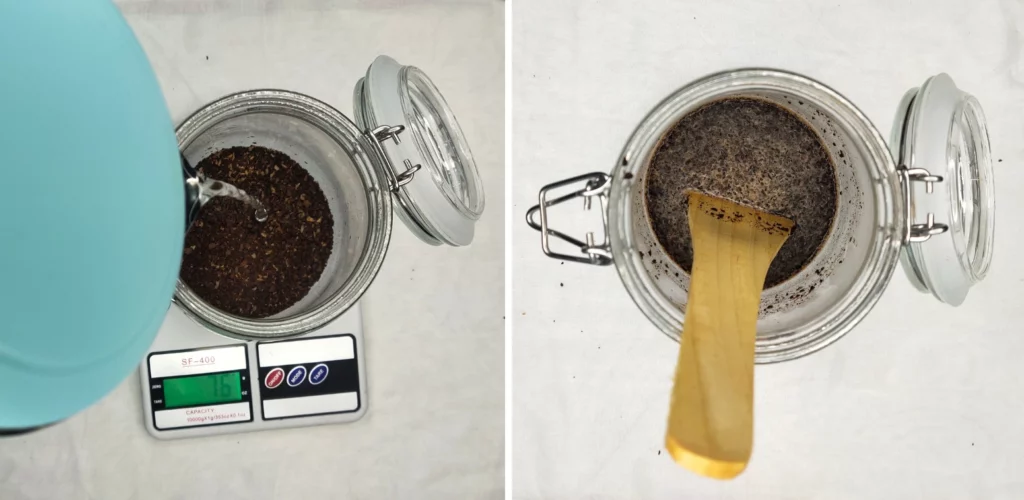
Take a spoon – choose the size that can touch the bottom of the mason jar. Give it a stir to ensure that all the grounds are wet and soaking.
Step 2: Steeping
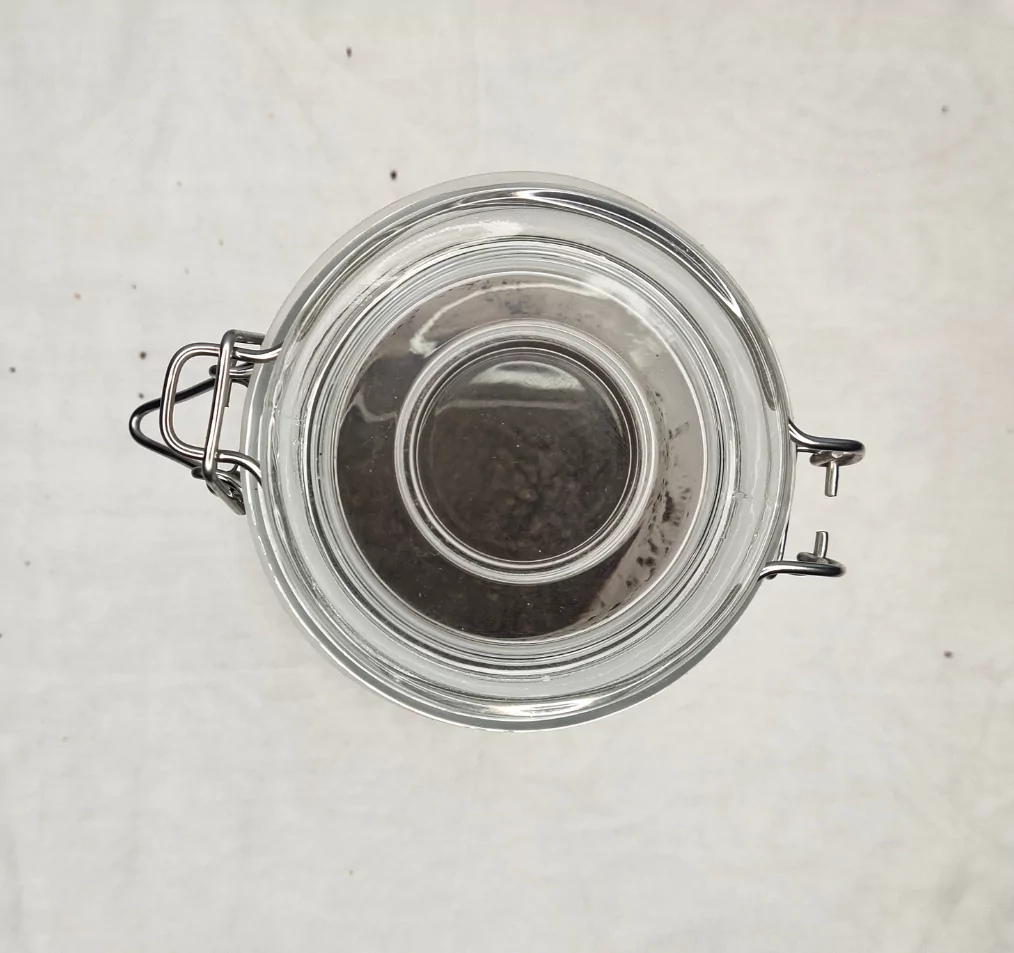
Close the lid of the jar tightly and put it into your refrigerator for infusion.
You can also leave it at room temperature for brewing, but please ensure to put the extraction in the fridge after straining it out.
For proper extraction, it will take around 12 – 24 hours, depending on how strong you want your coffee to be. For a beginner, brewing for 16 hours is good to start.
But remember, there is no hard and fast rule to follow the same, these can be adjusted based on your preferences.
Step 3: Straining
Take another mason jar or carafe, a cheesecloth, and a sieve.
Put the sieve over the jar and place cheesecloth over it – my cheesecloth is 1 meter long, so I am giving it two-fold, which means four layers.
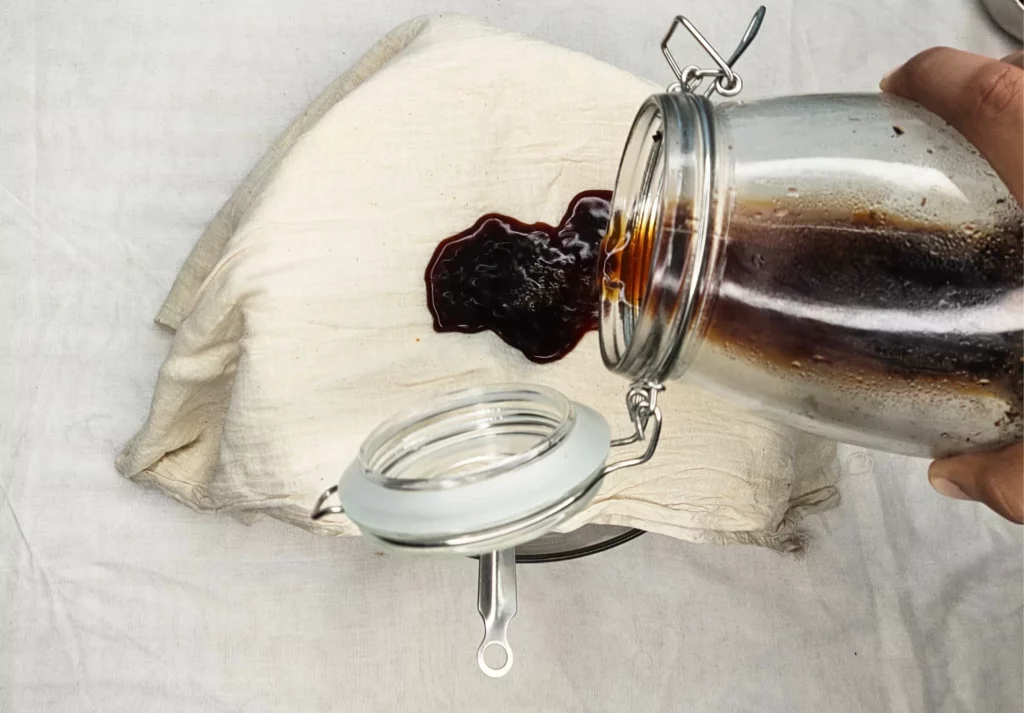
Start pouring from the jar in which you brewed your coffee and leave it to strain; it’ll take some time to pass through it.
To do it fast, you can move silt and sludge in the bottom with a spoon.
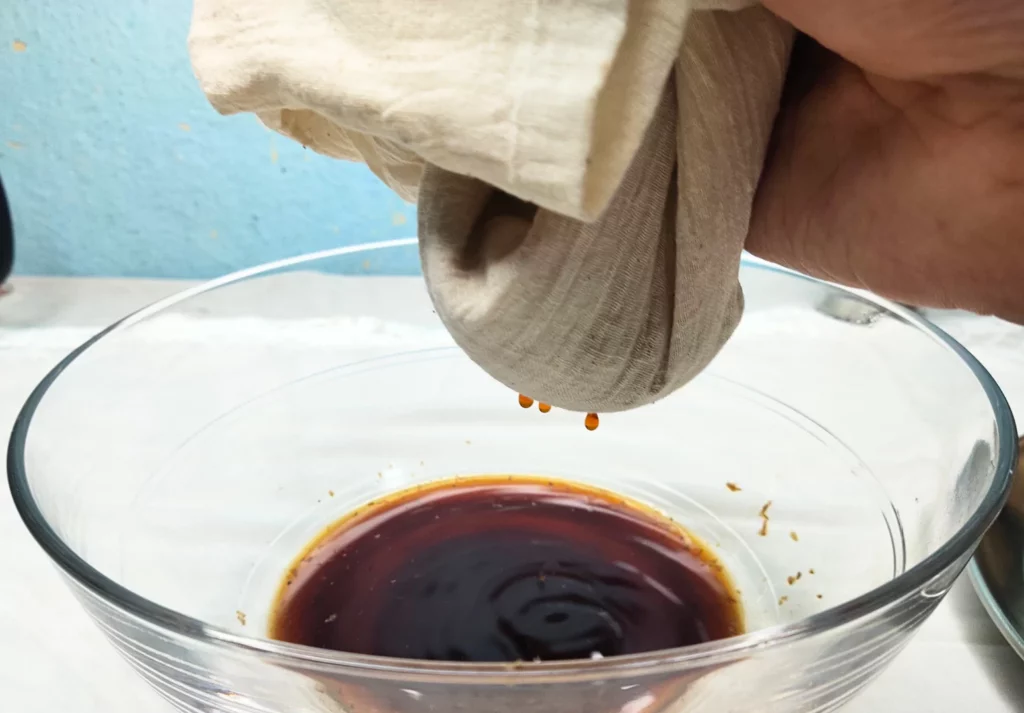
In the last, you’ll see coffee grounds left and only some drops coming out; now, to take out all the extraction, hold the cheesecloth from the corners, make it like a pouch, and squeeze. Tip – clean your hand before doing this.
Step 4: Dilute and Enjoy!
Store it in your refrigerator; it can last up to a week.
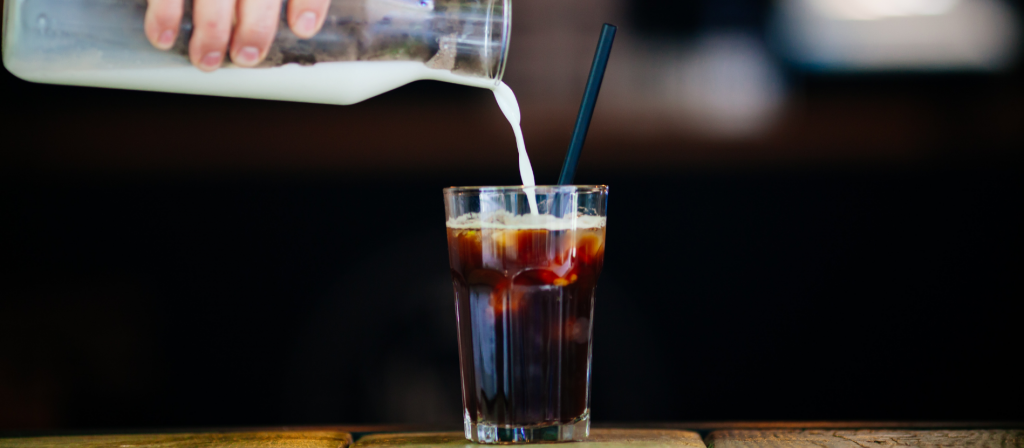
For drinking, you can put things as per your choice: milk (flavored one can be used too), water, or cream. Add ice cubes and Enjoy!
Some prefer to drink hot; to do this, use a microwave oven or a carafe and put it on the gas stove.
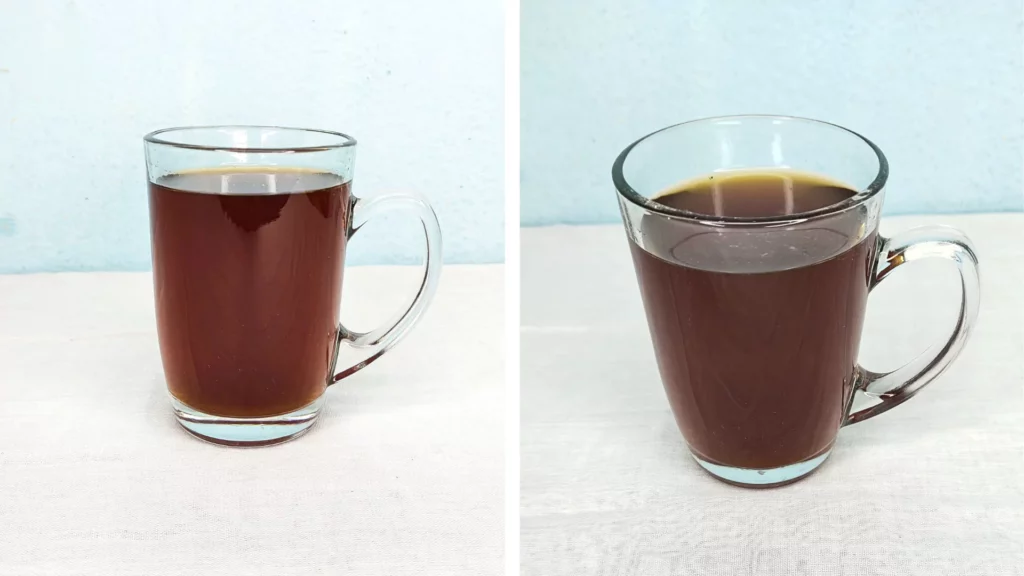
Dilution Ratio
We cannot directly consume cold brew concentrate because it is very stronger and bitter.
To make this drinkable, you should follow a 1:2 concentrate-to-water ratio, which means 1 part cold brew concentrate and 2 parts water or ingredients of your choice.
So, in general terms, we are going to drink it at a 1:8 coffee-to-water ratio. If you want more intense coffee, then try a 1:1 ratio; for a weaker coffee, test out at a 1:3 ratio.
You are not bound to follow these ratios for dilution; you are always free to test and make it more delicious.
You can use water, milk, alt-milks, cream, or flavorful syrups to dilute the cold brew.
Cold Brew Variations
Cold brew alone is quite refreshing to drink, but what if you can drink it with your favorite flavors? I am mentioning a few variations that will boost your cup of joe.
1. Vanilla Sweet Cream: After making cold brew, take a small bowl and add 1½ tablespoons of vanilla syrup and 1 tbsp of heavy cream. Stir it well.
In a glass, add ice cubes, add cold brew concentrate and dilute it with water (according to your dilution ratio) and then add vanilla and cream mixture. You’ll see a good layering effect in your coffee. Enjoy!
2. Mexican chocolate: After adding coffee grounds into the jar, in a separate small bowl, add 4 tbsp of sugar and a small amount of hot water just to dissolve the sugar.
Add 4 tbsp of unsweetened cocoa, 2 tbsp cinnamon powder, and 1 tbsp chili powder into the jar and mix all the dry ingredients. Then add sugar water and the rest of the water and stir it well.
The rest of the method is the same, dilute and Enjoy!
Here, I only added two variations, one before brewing and one after brewing, but this is not it, there are a lot of variations, and I’ll try my best to add more in the future, either in this post or in a separate post.
Cold brew vs Iced coffee
People often misinterpret cold brew as iced coffee and confuse ordering or making between these two.
It’s very simple, and you are never going to confuse again.
A cold brew is made with low or normal-temperature water and brewed for a prolonged period of 12–24 hours, where the water extracts the coffee grounds.
Whereas to make iced coffee, regular hot coffee is required, and then it is cooled in the refrigerator and drunk by adding ice cubes.
Tips for Cold Brew
1. Filter Water: We make cold brew concentrate with about a half ratio of coffee and water; If we drink black cold brew, then it contains about 80%-90% water.
Water plays an important role, so if you brew it with unfiltered water with unwanted molecules, then it may taste bitter and less flavorful. Hence, always prefer filtered water for a consistent brew.
2. Coffee Beans: Freshly roasted beans and grinding just before brew retain much better flavor than the pre-ground one. The main reason behind this is oxidation.
3. Atmosphere: While infusion, always tries to keep your cold brew away from the air; the more it is exposed to the atmosphere, the less flavor it will have due to oxidation.
Therefore, try to brew it in airtight jars; they are great or in one like them.
FAQs
Is cold brew less acidic?
According to research, cold brew coffee and hot brewed coffee were both measured on the ph scale, and yes, it was found that cold brew is less acidic.
But how much less acidic? These numbers may vary depending on roast profile, types of beans, and brewing time; however, a cold brew is up to 70% less acidic.
The oils and compounds that are responsible for high acidity are never withdrawn because brewing with low water temperature delivers smoother and healthier cups.
Cold brew is a relatively better option if you suffer from GERD and IBS symptoms. Although, the antioxidant level is less in the cold brew as compared to the hotter one.
Is there a lot of caffeine in cold brew than in hot brew?
Broadly speaking, a cold brew does not contain more caffeine than a hot brew.
You may think it uses a higher coffee-to-water ratio then how the caffeine is low? The answer is simple, the low water temperature.
From the same coffee grounds, a higher percentage of caffeine is extracted from the hot water as compared to the lower one. So, cold brew has an advantage here.
Also, after dilution, the caffeine percentage will also drop in your cup. All these lead to a bit low caffeine in a cold brew with similar serving size.
If you are more caffeine-conscious, you can try decaf beans; the brewing process is however the same.
What roast of coffee is best for cold brew?
There is no definite answer to this question; it depends on your taste and preferences.
Yet, according to studies, medium roast coffee extracts a higher amount of caffeine and chlorogenic acid with time. And dark roast coarser grind coffee has the least concentration of these two.
Should I stir my cold brew while steeping?
No, you shouldn’t, and actually, there are no extra benefits for stirring it out while brewing. Just give a gentle stir after adding water and leave it.
But if you stir during the infusion, you’re going to create turbulence inside the jar, and more and more grounds will settle down to the bottom and weaken your brew.
How long does cold brew last?
The answer varies on where you store it; if you store it at room temperature, then it will go bad within 2-3 days.
Always prefer to place it in a refrigerator; it will elevate the freshness of the coffee for up to 7-10 days. It will be better if you use an airtight container for storage.
What to do next?
We know cold brew doesn’t need fancy equipment, just basic kitchen stuff.
You can also brew several types of coffee without a coffee maker. To learn more about this, check out our article on how to make coffee without a coffee maker.